How To Build A Connected QR Code Printer
A Simple Way To Distribute Project Agent URLs
Imp-enabled devices communicate with the Internet via their agents, each accessible at a fixed and unique URL. Many imp-based applications host a small web control panel or command API at that address. During testing, it is often necessary to visit a device’s agent URL from a laptop, phone or tablet.
However, agent URLs are not easy to remember. Here then is a means to physically provide a user with a machine-readable agent URL. The agent URL is presented as a QR code: two-dimensional barcodes which can be read by a mobile device’s camera and a suitable app — the app scans the code, extracts the URL it contains and opens that address in the host device’s browser.
The system uses a low-cost, compact thermal printer of a type commonly available on the Internet: the CSN-A2. Coupled with an imp, it becomes a connected printer, and with the software described below, it becomes a connected printer of agent URL QR codes.
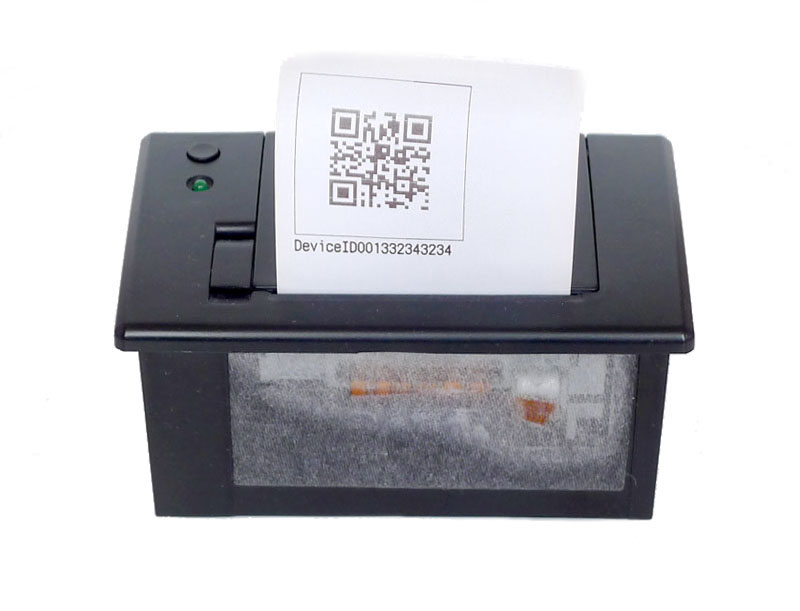
The QR code printer
The technique can be readily adapted to factory agents to allows a production device to transmit unique information, such as its MAC address, to the factory BlinkUp™ fixture, which can then output a unit-specific QR code through a directly connected printer.
For whatever application the printer is installed, the usage mode is simple: send the URL-encoded command generate and an agent ID — the code following the standard agent.electricimp.com/ in the agent URL — to the connected printer’s own agent URL and the passed code will be printed:
https://agent.electricimp.com/aBcDeFg1234?generate=1a2b3c4d5ef
Other API commands include help and debug. The latter can be used to toggle debugging mode, which will output extra informational message in the device’s log. If no command is passed to the API, it will display a PNG image of its most recently generated QR code.
The code currently makes use of a Google API for QR code generation. Google has notionally marked the API for deprecation, but it is still available long after the time at which it was marked for closure. Should Google ever make good on its promised to block the API, there are many others which likewise take a URL and return a QR code in the form of a PNG graphic.
Of course, PNG is an image storage format not a printable bitmap. To print a PNG, it must first be decoded, a process that involves parsing the retrieved PNG file to extract the image data; decompressing that data using the deflate method; reversing a series of byte-level filter algorithms; and finally rendering the image into bitmap form for printing.
All of these stages are conducted by a custom class, PNG. This is not yet a fully generic PNG decoder. While the data extraction, decompression and de-filtering sections are broadly generic, the bitmap render code is application-specific: it generates a 256 x 256-pixel bitmap for printing by the thermal printer.
The PNG class is implemented through a series of static methods which are called using the namespace PNG:
local response = http.get(url).sendsync();
local bitmap = PNG.decodePNG(response.body);
The class makes use of a second class, Inflate, which is used to decompress PNG-stored image data. Inflate itself makes use of a class, Tree, used to store code-generated Huffman code trees through which the data is compressed. Again, Inflate is implemented as a series of static methods called using the namespace Inflate. For example:
local data = Inflate.decompress(zlib);
The ‘heavy lifting’ involved in processing the QR code image data is left to the online agent — a good example of the division of responsibilities between agent and device. The device simply takes relayed bitmap data (8192 bytes) and outputs it to the printer. The printer itself is controlled by its own class, which you can view on Electric Imp’s public GitHub repo.
The printer itself is controlled via a serial bus and supports a great deal more functionality than is used here.

The QR code printer’s on-board imp002
The assembly is straightforward. We have used an imp002-based Make Deck P3V3 development board, but the same results can be achieved with the standard Electric Imp Dev Kit. The printer’s 5-9V power and GND terminals are connected to equivalent development board pins, and the serial RX, TX and GND lines likewise connected: pin 5 for printer RX, pin 7 for printer TX. Powering up the imp powers up the printer. For best results, make sure you use a power source that outputs no less than 5.2V, 2.3A.
To confirm the printer is working correctly, hold down the linefeed button while powering up the imp. This will cause the printer to output a test page.