Electric Imp Connected Factory Process Guide
An In-depth Reference For imp-enabled Device Production
This guide provides an in-depth guide to the Electric Imp Connected Factory and to the Connected Factory Process with which it is controlled. If you would prefer to begin applying the Connected Factory Process immediately, for initial lab-based testing and then for production, please make use of the Connected Factory Quick Start documentation, which has been prepared to get you up and running as fast as possible.
- If you are new to the manufacture of imp-enabled devices, we strongly recommend that you read the overview What is a Connected Factory? A Short Guide for Product Managers and Production Engineers before reading this document.
The following short video demonstrates the essentials of the Connected Factory Process:
Preamble: The Connected Factory Process And Blessing
A Production Device is any imp-enabled unit that is intended for sale and end-use rather than for development. The action by which a newly assembled device, called a Device Under Test (DUT), becomes a Production Device is called Blessing, and this is what the Connected Factory Process has been designed to perform. In order to be blessed, a DUT must be connected to the Internet and able to access the Electric Imp impCloud™. It is configured to do so using a technique called BlinkUp™.
A Connected Factory is where blessing takes place. It may be part of an existing assembly line or be a facility in its own right. For example, you may choose to have your connected devices assembled by a contractor in Asia then shipped to your own plant where they will undergo the Connected Factory Process separately.
The Connected Factory Process governs the preparation of the DUT to access the impCloud, testing the DUT and, if the tests are passed, blessing the DUT. It also determines which application code the Production Device receives after blessing.
In order to take advantage of the Connected Factory Process, you must be an Electric Imp Customer. impCentral’s production facilities, which are used to set up and then operate the Connected Factory Process are not made available to holders of free developer accounts unless they are granted access to a customer account as a collaborator.
The Connected Factory Process Roadmap
For a given connected product, the Connected Factory Process has two major phases: pre-production and production. Each of these phases comprises a number of distinct stages which are listed and described below. The pre-production phase involves setting up and testing the Connected Factory Process in preparation for the manufacture and provisioning of products that will be compatible with the Electric Imp Platform, followed by the implementation of the Process with impCentral’s production tools.
The production phase concerns the actual operation of the Connected Factory Process within a Connected Factory.
It is strongly recommended that you make use of impCentral’s factory test facility during the pre-production phase. Indeed, setting up and using the test environment forms the majority of this document. This is because the test environment operates exactly like the production environment. It allows you to thoroughly check your factory firmware with working BlinkUp fixtures and DUTs before you go into production. Production is a straightforward duplication of the testing process.
Lab testing does not eliminate the need to verify the process within your chosen Connected Factory partly because of physical differences between the test and production locations, but mostly because of differences between their respective networks and Internet connectivity. However, thorough testing in the lab can save considerable time and cost later on, especially if your Connected Factory is in another country and on another continent.
After production may come further phases — for example, final device assembly; labelling and packaging for shipment; and logistics and inventory management — but since these will be customer- and product-specific they are not covered here. They are not a part of the Connected Factory Process and take place once it has been completed.
However, there are post-production tasks — actions which you may take once the production run is in progress or has been completed — that are related to the Connected Factory Process. Such tasks are primarily concerned with releasing application software updates to Production Devices in the field, and obtaining information, such as device logs, for technical support and real-world testing purposes. Though not specifically a part of the Connected Factory Process, these post-production tasks use some of the same impCentral functionality used to configure and implement the Connected Factory Process, from which they follow on logically, and so are covered in this document.
Pre-production
- Develop And deploy your product’s application firmware
- Develop Your factory firmware
- Prepare your BlinkUp Fixture
- Test Your Connected Factory Process
- Take Your Connected Factory Process To Production
Production
Post-Production
Pre-Production: Set Up And Testing
1 Develop And Deploy Your Product’s Application Firmware
Your application firmware comprises not only the device-side software that will run on your connected product (the device), but also the impCloud-hosted code (the agent) which is the device’s gatekeeper, mediating the device’s access to other Internet-based resources.
You develop your application firmware using impCentral or with your own tools and the impCentral API to upload your code to the impCloud and transfer it to your Development Devices. Application firmware is developed within Development Device Groups and later deployed to Production Devices via Production Device Groups. Each group belongs to a single Product. Products are how impCentral embodies a connected product or family of products, with multiple device groups for different types and/or versions of device and their respective software releases.
When your application firmware is ready to be transferred to devices, you create a specific instance of your code called a Deployment. Each deployment is distinguished by its SHA, and the date and time at which it was created. A deployment represents a fixed build of your application firmware at that specific point in time. The creation of a deployment and its delivery to a Development Device Group’s devices is managed automatically by the impCentral code editor when you click Build and Force Restart or one of the other options in the code editor’s Build pop-up. However, you will need to deploy code to Production Device Groups manually.
In order to make a deployment available to impCentral’s test and production facilities, it must first be Promoted. This can be achieved either by clicking the code editor’s Promote button after you click Build and Force Restart, or by subsequently navigating to the Product’s list of Development Device Groups and clicking Deployments under MANAGE for the desired group. Locate the required deployment in the Deployments list and click Settings under MANAGE. In the Deployment’s settings, ensure the deployment’s Promoted checkbox is set:

Note Promotion only applies to a specific deployment. If you subsequently update your application firmware’s code in the code editor and need to make it available for production, you will need to promote the new deployment; the existing deployment will not be updated, and the new deployment is not automatically promoted. This is to ensure that only those versions expressly judged to be suitable for deployment to Production Devices are able to be deployed via impCentral.
2 Develop Your Factory Firmware
Factory firmware comprises Squirrel code which runs on devices in the factory (or in the test environment). These devices include DUTs, which run DUT firmware in the Connected Factory before they receive the application firmware they will run in the field as Production Devices. DUT firmware is responsible for testing and blessing all DUTs before they come off the assembly line and are distributed to end-users.
Your BlinkUp Fixtures also have their own factory firmware, which performs factory BlinkUp operations.
2.1 DUT Firmware
DUT firmware is developed in impCentral using a Test DUT Device Group. You create device code and agent code; factory agents can be used to enable communication between a DUT and the BlinkUp Fixture (for example, to relay device-specific information that the BlinkUp Fixture will output via a connected label printer or laser-etching station) or to post or retrieve data from Internet-connected resources.
To minimize factory escapes — working and saleable production devices that are outside of your supply chain — it’s very important to ensure that your DUT firmware is not a version of your application firmware. A DUT that is removed from the factory should not be able to operate as a production device.
To create a new Test DUT Device Group, navigate to the Product’s Test Zone:

Now select the Test DUT Device Groups sidebar icon (![]() ). Now click the Create New Device Group button: in the Create Test DUT Device Group panel that appears, provide a name for the new group and click the Create button:
). Now click the Create New Device Group button: in the Create Test DUT Device Group panel that appears, provide a name for the new group and click the Create button:

2.2 Fixture Firmware
Fixture firmware is developed in impCentral using a Test Fixture Device Group. In order to create a Test Fixture Device Group, you must first have created both a Test DUT Device Group and a Test Production Device Group; these will be selected as the new group’s targets.
To create a new Test Production Device Group, you will first need to have promoted some application firmware. This will be the code devices receive when they are assigned to the new Test Production Device Group. Navigate to the Product’s Test Zone then select the Test Production Device Groups sidebar icon (![]() ). Now click the Create New Device Group button: in the Create Test Production Device Group panel that appears, provide a name for the new group and click the Create button:
). Now click the Create New Device Group button: in the Create Test Production Device Group panel that appears, provide a name for the new group and click the Create button:

To create a new Test Fixture Device Group, navigate to the Product’s Test Zone then select the Test Fixture Device Groups sidebar icon (![]() ). Now click the Create New Device Group button: in the Create Test Fixture Device Group panel that appears, provide a name for the new group, select the group’s targets, and click the Create button:
). Now click the Create New Device Group button: in the Create Test Fixture Device Group panel that appears, provide a name for the new group, select the group’s targets, and click the Create button:

2.3 The Factory API
Factory firmware of either DUT or fixture type makes use of a selection of imp API methods collectively known as the factory API. Some calls are mandatory, others optional. For instance, your factory firmware must include these two calls:
- server.factoryblinkup() — Included in the fixture firmware in order to initiate BlinkUp.
- server.bless() — Included in the DUT firmware in order to bless DUTs that have passed your hardware tests.
The following factory API method and property are strongly recommended and will be used in the DUT firmware:
- imp.clearconfiguration() — Clears the DUT’s factory WiFi settings and enrollment token.
- imp.configparams — Access DUT settings.
The following factory API methods are optional and will be used in the DUT firmware:
- imp.setenroltokens() — Sets the device’s enrollment tokens directly.
- imp.setwificonfiguration() — Sets the device’s WiFi settings directly.
- imp.setcountry() — Sets the device’s wireless regulatory region (imp modules only).
- imp.setnvramimage() — Writes the WiFi controller settings page (imp003, imp004m and imp005 only).
For more detailed guidance on the role of these methods and on preparing your factory firmware, please see Writing, Testing And Using Factory Firmware.
3 Prepare Your BlinkUp Fixture
You will need to construct or purchase a BlinkUp Fixture before you begin testing your factory firmware or implementing it in production. Electric Imp offers for purchase a ready assembled BlinkUp Fixture, the impFactory™, which is also available as a reference design if you wish to build your own.
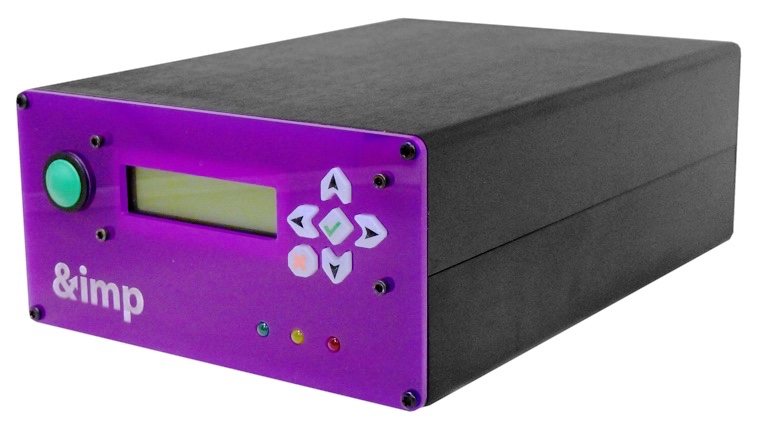
At minimum, a BlinkUp Fixture requires just an LED to transmit the BlinkUp signal and a means to initiate the BlinkUp transmission: a button may be pressed manually by an assembly line operator, or a wire can send a signal from a sensor in the assembly line. This is demonstrated in this basic BlinkUp Fixture, which is suitable for testing your Connected Factory Process, but is not intended for installation on the assembly line.
Your BlinkUp Fixture should initially be assigned to a Test Fixture Device Group. This is done by first adding it to your Electric Imp account using the Electric Imp mobile app. Navigate to the Product’s Test Fixture Device Groups list and click Code under MANAGE for the chosen group. This opens the code editor; click on the Assign Devices button and select the fixture from the list of devices presented to you:

Only one BlinkUp Fixture is required for each assembly line but you may prepare and use as many as you wish. For example, you might have three sections on your assembly line, each requiring its own DUT firmware (for example, different components are added in each stage, and you wish to test these additions on a stage-by-stage basis, rather than all at the end). You will therefore need at least one fixture for each section. You will also need three fixture firmware implementations: one for each section.
BlinkUp Fixtures can be re-assigned to a different Test Fixture Device Group or Fixture Device Group — even ones that are part of a different Product — in order to be used again for different production runs.
4 Test Your Connected Factory Process
It is essential that you test your configuration of the Connected Factory Process before you go into production. This can be done very easily in your lab in a way that works exactly as if you were in production. This lab-based testing allows you to thoroughly check your DUT and fixture firmware, and your mobile BlinkUp app.
4.1 Configure Your Factory Test Webhooks
impCentral provides two event-triggered webhooks which you can use to link the Connected Factory Process to your own record-keeping systems. These webhooks are applied separately to Test Production (in the impCentral Test Zone) and Production Device Groups (in the Production Zone). The webhooks will not be triggered if they have not first been configured. Webhooks are configured in the chosen device group’s Settings panel:

The two webhooks are:
- Blessing — This is called when a DUT has been successfully blessed and become a Production Device.
- BlinkUp — This is called when a Production Device (ie. a blessed DUT) is activated.
To configure either webhook, you must provide the URL of either an endpoint on your server, a third-party logging service, or even a development device’s agent. The impCloud automatically posts an HTTP request with a data payload in JSON format to the endpoint when the named event takes place.
- For more detailed information on configuring webhooks and the data they return, please see How To Use Production Webhooks.
4.2 Run Connected Factory Process Tests
impCentral’s Test Zone allows you to thoroughly evaluate your Connected Factory Process and all of its key components — fixture firmware and BlinkUp Fixtures; DUT firmware and DUTs; Production Devices, application firmware and end-user BlinkUp — before you go into production. Not only can you run the fixture firmware on BlinkUp fixtures assigned to a Test Fixture Device Group, but these fixtures can be used to prepare DUTs for impCloud access so that they can receive and run the DUT firmware, be tested themselves and then be blessed to become Test Production Devices which can now be used to test end-user BlinkUp.
4.2.1 When To Download Application Firmware To Test Production Devices
You can choose when a Test Production Device receives its target application firmware:
- Immediately after blessing.
- After its activation (see below).
The former is the recommended setting for production and so is the default option within both the Production Zone and the Test Zone. However, you may choose to use the second option, and this can be selected in your Test Production Device Group’s Settings panel. See the instructions above for guidance on accessing the Settings panel.
4.2.2 Re-use Test Blessed Devices In Subsequent Tests
Unsuccessfully blessed DUTs can be re-used in further testing. So can Test Production Devices, but you will need to unbless them first. This can be achieved by navigating to the Test Production Devices list and then locating the devices you wish to unbless. For each one, click Delete in the MANAGE column. Deleting a Development Device removes it from your account; in the case of Test Production Devices, it also returns them to an unblessed state ready to be re-blessed. You will be asked to confirm your decision: click on the Delete button to do so.
4.3 Develop And Test Your BlinkUp App
One of the many advantages provided by the impCentral Test Zone is that it yields Test Production Devices which are functionally identical to the Production Devices your Connected Factory will eventually output. You should therefore use your Test Production Devices to test the BlinkUp SDK-based app that you will need to provide to your end-users once your product goes on sale.
Production Devices, like all imp-enabled devices, need to be enrolled into the Electric Imp impCloud before they can function as fully connected products. Development Devices and BlinkUp fixtures are enrolled using the Electric Imp app; Production Devices are enrolled into the impCloud using an app of your own which incorporates the BlinkUp SDK. When an end-user enrolls a given device is called Activation; it may also be used to provide the on-board imp with local WiFi network credentials, if that is how your product connects to the Internet.
Having developed your app for Production Devices, you can also use it to activate Test Production Devices. Whether you are using Production or Test Production Devices, the activation experience is identical. You can view Test Production Devices’ logs as detailed in section 4.2, above.
5 Take Your Connected Factory Process To Production
Once you have completed testing to your satisfaction, you are ready to complete the set up of your Connected Factory Process. This involves preparing the Production Device Group, DUT Device Group and Fixture Device Group which you will be using in production. These have to be created and set up manually; they will not be set up for you as part of the test process. However, impCentral provides an easy way to generate these entities directly from their Test equivalents.
5.1 Promote Application, DUT And Fixture Firmware
To make use of your application firmware and two sets of factory firmware in impCentral’s Production Zone, you need to promote chosen deployments. You will have done this already for your application firmware, in order to make use of application firmware in the Test Zone. However, to begin production, you will need to promote your DUT firmware and your fixture firmware.
To do so, navigate to your Product’s Test Fixture Device Groups list and click Deployments under MANAGE. Find the desired deployment (the most recent ones are listed first) and click Settings under MANAGE. The Deployment Settings panel will appear — make sure its Promoted box is checked. Add a description as it will help you distinguish one promoted deployment from another later on. You can also note the date and time of the deployment, and the deployment’s SHA. Click Update:

Follow the same steps to promote a DUT firmware deployment, but this time navigate to your Product’s Test DUT Device Groups list.
5.2 The Production Zone
The remaining Connected Factory Process setup work takes place within impCentral’s Production Zone: click on Production Zone under MANAGE in your account’s Products list, or if you have already selected a Product, click Production in the navigation bar under the name of your product:

Note impCentral’s production-related functionality is highlighted in green to distinguish it from development and test functionality, which are highlighted blue and orange, respectively.
The green left-hand sidebar provides access to your Product’s Production (![]() ), DUT (
), DUT (![]() ) and Fixture Device Groups (
) and Fixture Device Groups (![]() ). You must create the Production and DUT Device Groups first as they will be needed when you subsequently create the Fixture Device Group. In each case, from the list of device groups click the Create New Device Group button to add a new group.
). You must create the Production and DUT Device Groups first as they will be needed when you subsequently create the Fixture Device Group. In each case, from the list of device groups click the Create New Device Group button to add a new group.
5.3 Prepare A Production Device Group
Creating a Production Device Group involves selecting the application firmware deployment that will be sent to Production Devices automatically once they are blessed. Only promoted deployments are available for use in production. Locate your promoted application firmware deployment (from Step 1, above) in the list of available deployments using its date, SHA and description, then select it. You must also enter a name for the new group. Finally, click the Create button:

You can add as many Production Device Groups to your Product as you need. They are all created as described above. For example, you may wish to roll out updated application firmware to a selection of Production Devices for in-field testing before deploying to all Production Devices. In this case, promote the new application firmware deployment, create a new Production Device Group (‘B’) using the promoted code, and then add devices from the first Production Device Group (‘A’) to the new one. Upon re-assignment, the devices will receive the new code (or will do so when they next connect to the impCloud).
When you are happy with the new release, transfer all remaining devices from A to B. In due course, when you update your application code, deploy the update to A and move a small number of devices from B to A.
To assign Production Devices manually, navigate to the Product’s list of Production Device Groups then click Devices under MANAGE. If you have already selected the Production Device Group, click on the Production Devices icon ( ) in the left-hand sidebar. Select multiple devices, then click the Assign button at the top of the list to select a new Production Device Group to move the selected devices to.
5.3.1 Polite Firmware Deployment
When new application firmware is deployed to a Production Device Group, each device’s own code can decide whether it should update immediately. This is called a Conditional Restart and requires that the firmware (of whatever type) supports Polite Deployment. If this is the case, a given device may choose to defer the firmware update if it is performing a critical task that should not be interrupted. To accept the firmware update, the device must manually restart under the control of the application firmware. If the device is offline, it will receive the update notification when it next connects, and can choose at that point how to proceed.
When you create a Production Device Group and select its initial deployment, that deployment is set to Conditional Restart for you. If you wish to change this, you can simply redeploy (ie. duplicate) the deployment: if you are already viewing the Production Device Group, click on the Deployments sidebar icon (![]() ), or navigate to the Product’s Production Device Groups list and click Deployments under MANAGE for the chosen group. Now click Redeploy under MANAGE for the source deployment. impCentral will create a duplicate deployment; you can now change the Restart Options (section 3 of the panel) and change the deployment’s description if you wish. Finally, click the Deploy button:
), or navigate to the Product’s Production Device Groups list and click Deployments under MANAGE for the chosen group. Now click Redeploy under MANAGE for the source deployment. impCentral will create a duplicate deployment; you can now change the Restart Options (section 3 of the panel) and change the deployment’s description if you wish. Finally, click the Deploy button:

If the firmware does not support Polite Deployment, or you choose Forced Restart when you create a new deployment, then all devices within the target device group (of whatever type) that are online will immediately restart and receive the new firmware. Offline devices will receive the update when they next connect.
- Please see the guide Polite Squirrel Deployment for more details.
5.3.2 Application Firmware Loading
You can choose when a Production Device receives its application firmware:
- Immediately after blessing.
- After a device’s first end-user BlinkUp (ie. activation).
The former is the default and the recommended setting as it ensures Production Devices can run application firmware as soon as end-users power them up. However, you may choose to use the second option, and this too is set in the Production Device Group’s settings: navigate to your Product’s list of Production Device Groups, then click Settings under MANAGE for the chosen group:

This setting can be changed at any time.
5.3.3 Webhooks
Whether you made use of impCentral’s webhooks during testing or not, you may wish to make use of them in production. Webhooks are configured in a chosen Production Device Group’s settings: navigate to your Product’s Production Device Groups list, then click Settings under MANAGE for the required group.
The two webhooks are:
- Blessing — This is called when a DUT has been successfully blessed and been added to its target Production Device Group.
- BlinkUp — This is called when a Production Device is successfully activated using BlinkUp.
To configure either webhook, provide the URL of an endpoint on your server, a third-party logging service, or even a development device’s agent. The impCloud automatically posts an HTTP request with a data payload in JSON format to the endpoint when the named event takes place.
5.4 Prepare A DUT Device Group
Creating a DUT Device Group involves selecting the DUT firmware firmware deployment that will be sent to DUTs automatically when they undergo BlinkUp. Only promoted deployments are available for use in production. Locate the DUT firmware deployment you promoted earlier (from Step 5.1, above) in the list of available deployments using its date, SHA and description, then select it. You must also enter a name for the new group. Finally, click the Create DUT Device Group button:

You can add as many DUT Device Groups to your Product as you need. They are all created as described above. For example, you may have three separate stages on your assembly line, each requiring its own DUT firmware to perform tasks unique to its stage. DUTs cannot be assigned manually; you will need a BlinkUp fixture for each stage, and the fixture will be assigned to a Fixture Device Group that has the stage’s DUT firmware set as its target.
5.5 Prepare A Fixture Device Group
Creating a Fixture Device Group requires that you select a Production Device Group and a DUT Device Group as its targets. When you create a new Fixture Device Group, you will see lists of the Product’s Production and DUT Device Groups. Select one of each, give the group a name, and click the Create Fixture Device Group button:

You also need to deploy the fixture firmware you promoted earlier (from Step 5.1, above). Click on Deployments under MANAGE. This presents a list of code deployments made to the device group. Click the New Deployment button. In the panel that appears, locate a promoted factory firmware deployment using its date, SHA and description, and then select it. Enter a description for this new deployment and then click the Deploy button:

Note This procedure is how you will make new deployments to your Production, DUT and Fixture Device Groups. You must create each deployment under the appropriate type of device group: you can’t, for example, create a deployment intended for a Production Device Group from within a Fixture Device Group Deployments list; you must select Production Device Groups from the left-hand sidebar first.
Lastly, click on the Fixtures icon () in the left-hand sidebar. Alternatively, click Fixtures under MANAGE from the Product’s Fixture Device Groups list. Click the Assign button.
In the Assign Devices panel that now appears, enter the device ID(s) of your factory BlinkUp fixture(s) in the box on the left-hand side. The Product and Device Group to which these fixtures will be assigned have been set for you, so just click the Assign button:

5.5.1 Changing The Fixture Device Group’s Targets
When you create a Fixture Device Group, you must choose its Production and DUT Device Group targets. However, these settings are not fixed and can be changed. To do so, navigate to a Product’s Fixture Device Groups list and click Settings under MANAGE for the chosen Fixture Device Group. All of the Product’s Production and DUT Device Groups will be listed here. If there are a large number of them, you may need to navigate the list’s various pages by using the arrow buttons (![]() ) to find the group you want. Select the new target(s) and click Update. All DUTs blessed from this point will be assigned to the new target.
) to find the group you want. Select the new target(s) and click Update. All DUTs blessed from this point will be assigned to the new target.
5.5.2 Adding Fixtures In The Factory
After your fixture has been installed in the factory, a factory operator can use the Electric Imp app to configure the unit for the local WiFi access, if that is how the fixture connects to the Internet (depending on design, it may connect by Ethernet or cellular). The operator uses the Electric Imp app’s targeted BlinkUp feature, which will keep the fixture in your account after it has been configured with the factory WiFi credentials. The operator will need an Electric Imp account of their own, and this account must have been already registered as one of your collaborators and granted the BlinkUp Device role.
Alternatively, your factory may have its own generic fixture which you will be using for your production run. In this case, you may not have yet assigned a fixture to your Fixture Device Group. Instead, a factory operator can use targeted BlinkUp to add the factory’s own fixture to your account for the period of the production run. When they have done this, you can assign the fixture to the correct Device Group yourself. Upon completion of the production run, the factory operator will simply re-configure the fixture to regain ownership of the device.
Again, the operator will need an Electric Imp account of their own, and this account must have been registered as one of your collaborators and granted the BlinkUp Device role.
In either of theses cases, the operator’s status as a collaborator can be revoked once production has completed. In the first of these two cases, you may wish to have the factory return your fixture to you.
Going Into Production
The production phase of the Connected Factory Process involves using your BlinkUp fixture(s) on the assembly line to prepare each newly assembled DUT for impCloud access. DUTs are prepared one at a time. As you saw in the testing phase, upon a successful BlinkUp, the DUT will be automatically assigned to its target DUT Device Group and thus receive its assigned factory firmware.
This part of the Connected Factory Process takes place entirely within the Connected Factory. It does not require the use of impCentral. The following diagram summarizes what takes place on the assembly line:

This flow comprises four key operations, which each DUT must go through:
1 Connect A DUT To The impCloud
However the DUT connects to the Internet — WiFi, Ethernet or cellular — in the Connected Factory, it requires a factory enrollment token with which to authenticate itself to the impCloud. It receives this token from the BlinkUp fixture via BlinkUp, which also sends factory network access credentials, if required. BlinkUp takes approximately five seconds.
2 Receive And Run The DUT Firmware
A DUT’s progress while being configured and then connecting to the impCloud will be indicated on its LED with a selection of these patterns. Upon a successful BlinkUp, the DUT as automatically added to its assigned DUT Device Group (one of the configuring fixture’s Fixture Device Group targets) which causes it to receive and run its DUT firmware.
To view the logs for a DUT, locate its DUT Device Group and click Devices under MANAGE. Locate the DUT in the list and then click on its name. You will now be presented with the device’s information readout. Click on the LOGS tab to begin viewing logs for that device. Production logging can be used to help you monitor the Connected Factory Process and to assess your DUT firmware while it is running on a proper assembly line.
3 Test And Bless The DUT
The DUT runs the deployed DUT firmware which you will have written to perform a series of tests on the unit’s hardware. The outcomes of all the tests are collated into a single true or false value represented, respectively, test pass or test fail. The DUT firmware may also retrieve application data from the Internet and stored it in the unit’s Flash.
Note To minimize factory escapes — working and saleable production devices that are outside of your supply chain — it’s very important to ensure that your DUT firmware is not a version of your application firmware. A DUT that is removed from the factory should not be able to operate as a production device.
Eventually, the DUT must be blessed. This registers it as being ready for sale to an end-user, ie. it makes the DUT a Production Device. If the device is not blessed, it will be rejected by the impCloud when an end-user attempts to activate it. Blessing logs the unit with the Electric Imp billing system.
The successful completion of this stage of the factory process will be signalled to your server if you have made use of the Blessing webhook. It will also be signalled locally by the unit’s LED turning green and remaining lit until power is removed.
4 Clear The Production Device’s Settings
Immediately after blessing and until the Production Device’s Squirrel goes idle, there is scope for a few remaining operations to be performed. In particular, the DUT firmware should clear the unit’s stored WiFi credentials and factory enrollment token (added by the factory BlinkUp). This ensures that the unit will be in a clean state when an end-user powers on their newly purchased device.
Once blessed, the Production Device is added to its assigned Production Device Group. When Squirrel goes idle, the device receives its application firmware, unless you have elected to have the software download once an end-user has activated the device in the field, as shown above. Downloading the application firmware immediately is the default.
Whenever an application firmware update is deployed to the group, the Production Device will receive the new code automatically and without end-user intervention. This bond is effectively permanent; unlike a development device, the end-user cannot change the blessed device’s application firmware.
Production Troubleshooting
Given rigorous testing in the lab before you move to the Connected Factory, the Connected Factory Process should proceed smoothly, as has been demonstrated time and again by many Electric Imp customers. If you do experience difficultly, there are a number of key factors you should consider before contacting Electric Imp for assistance.
impOS Updates
When a DUT first connects to the impCloud, it checks whether it is running the most up-to-date version of impOS™ that it has been allowed to run. If an update is available, this will be downloaded and installed now: the status LED will go solid green for the duration of the upgrade process. This is not an indication that blessing was a success — the DUT has not yet downloaded and executed your factory firmware.
The update duration is relatively short but highly dependent on local Internet conditions — connectivity speed, the presence of a proxy, etc. — so you should not assume your factory firmware will run after a measured time. The duration of the ‘BlinkUp → possible update → restart → test-and-bless’ cycle will likely be different between your lab and your factory, and may even differ between DUTs, depending on connectivity conditions.
When updating is complete, the DUT will restart, re-connect, and download and run the factory firmware — subject to the potential issues described below.
BlinkUp Issues
DUTs
If BlinkUp failed (indicated by a fast red flash, or the LED continuing to slowly flash orange), check the physical placement of the DUT relative to the BlinkUp fixture’s emitter. During the testing phase, you may also wish to check the DUT’s BlinkUp circuit design and whether the product’s industrial design is impeding the signal path to the sensor.
If BlinkUp succeeded (three seconds of solid green followed by red and amber flashes) but the DUT doesn't connect to the impCloud (slow green flashes), check the network credentials embedded in or retrieved by the fixture firmware and passed into the server.factoryblinkup() call.
BlinkUp Fixtures
- Make sure the BlinkUp fixture is configured for network access using the Electric Imp mobile app.
Blessing Issues
DUTs
If your DUT firmware includes tests of the DUT hardware, you should feed the result of those tests as a single Boolean value into the server.bless() call. This ensures that the DUT’s LED will signal red if the hardware test failed, allowing a factory operator to identify the faulty unit and remove it. As that is the same effect as blessing itself failing, your DUT firmware should include log messages and/or relay messages to your server to help you determine where the point of failure lies. If it is in the hardware test section of your DUT firmware, check the code and/or the DUT hardware manually.
If a DUT is connected but is not indicating bless success or failure, check that the promoted DUT firmware includes the mandatory server.bless() call and that it has not been disabled (this is now unnecessary).
BlinkUp Fixtures
BlinkUp fixtures will not be able to perform factory BlinkUp if they are not assigned to a Fixture Device Group. To assign a fixture to a different Product, you need to first remove it from the Fixture Device Group that it is currently assigned to. Once that’s done, you can’t use it to configure DUTs until it is re-assigned.
This issue is commonly seen with customers who are testing multiple factory flows simultaneously using the same fixture. Either label the fixture with the name of the Product which contains the Test Fixture Device Group or Fixture Device Group to which it is currently assigned, or obtain sufficient fixtures so that each Product has its own unit.
Factory Escapes
DUTs which leave the factory in an unblessed state and end up in the hands of end-users are called factory escapes. These devices will not work for end-users.
To avoid factory escapes, take care to ensure that all DUTs are tracked and that only Production Devices are placed in product packaging and dispatched from the factory. We strongly recommend that you print a self-adhesive label which can be attached to Production Devices and/or their packaging — or they can be laser-etched — when they are successfully blessed. You can use your factory firmware’s agent code to relay device information to the printing/etching station to ensure each label or mark is tied to a specific device.
Devices coming off the production line without a mark or label should be considered faulty and sent back for re-work. They should not remain in the production flow. This can help to significantly minimize factory escapes.
Post-Production Actions
Post-production tasks center on actions which you may take once the production run is in progress or has been completed. Such tasks are primarily concerned with updating Production Devices in the field, and obtaining information, such as device logs, for technical support and real-world testing purposes.
Deploying Software Updates
The Electric Imp Platform makes it very easy to promote and deploy updates to application firmware. This may be done at any time, and does not require action on the part of your end-users.
Deploying an update is a two-stage process, both steps being conducted in impCentral:
- Promote the required application firmware deployment from within its Development Device Group, as per Step 1, above.
- Deploy the promoted firmware to one or more Production Device Groups, as per Step 5.3.
These two operations are performed separately in order to provide you with an opportunity to identify and correct issues in the chosen version before deployment takes place. Deployment is irrevocable, but issues can be quickly rectified by promoting and then deploying a subsequent version of the code.
You may choose to develop updates in the original Development Device Group or in a new Development Device Group created for the purpose — the choice is yours. Similarly, if you want to deploy the update to a subset of your production devices, you simply create a new Production Device Group to which the updated code’s promoted SHA will be deployed (see Step 5.3, above) and then migrate a proportion of the first group’s Production Devices to the new own. On assignment, they will receive the new group’s deployed code. When the update meets will QA approval, you can move the remainder of your Production Devices to the new group. The original group can later be re-used to sample the next update.
Deployment is the final step in the update process. Once a new SHA is deployed to the chosen Production Device Group, every Production Device assigned to that group will receive the new software. Devices which are powered down or sleeping at this point will update when they next come online. If you are making use of Polite Deployment, online devices may choose not to update immediately but defer installation until a critical task has completed. These devices must restart manually to apply the update.
Unblessing Production Devices
It is possible to unbless Production Devices, a process which makes the target device able to be used for development. To perform this task, locate the relevant Production Device Group and click Devices under the MANAGE column. Locate the device in the list and then click Delete under MANAGE. You will be asked to enter your unblessing key, a code unique to your account. Devices cannot be unblessed without this code; please contact Electric Imp Customer Support to request your code.
If you know the ID, MAC address or agent URL of the target device, you can use the device lookup option in the devices menu ( ) to call up the device’s details. Now look for the Actions menu at the top right of the view and select Delete from it to unbless the device (if it is a Production Device).
Production Logging
To view the logs for a Production Device, locate its Production Device Group and click Devices under MANAGE. Locate the device in the list and then click on its name. You will now be presented with the device’s information readout. Click on the LOGS tab to begin viewing logs for that device.
The Dashboard: Production Data
All device groups include a data readout, the Dashboard, to provide you with useful information about and insights into the devices assigned to the group. The Dashboard is particularly useful for Production Device Groups, to view statistics collated from millions of devices in the field, but it is available to all device group types. To view a group’s Dashboard, click on the group’s name from any of the Product’s device group lists. If you have already selected a group, view its Dashboard by clicking the Dashboard sidebar icon (![]() ).
).
The Dashboard comprises three sections. first of these provides useful information about the device group: the Product to which it belongs; the number of devices currently assigned to it; and the firmware Deployment currently applied to the group:

The second section provides aggregate device-impCloud communications data, either in terms of the number of messages passing in (to devices) or out (to the impCloud), or the volume of data transmitted. Click on the Bytes button to switch to the messages view, and back again:

Move the cursor across the chart to view data for specific times. Click the refresh button (![]() ) to update the chart at any time.
) to update the chart at any time.
Click on the date value to select a different end date. How much device data the chart will compile depends on whether you select Days, Hours or Minutes: the previous 30 days, seven days or 24 hours, respectively:

The final section presents a global map pinpointing the approximate location of the group’s devices based on their IP addresses. Click on the World button to select a US view, or vice versa:

Device locations are derived from known relationships between IP address and geography, but some international Internet Service Providers may span their host nation’s IP addresses across multiple territories, so this data can only ever be an approximation.