Tutorial: An Introduction To Unit Testing With impWorks impt
Increase Your Confidence In Your IoT Application Code
Unlike the impCentral™ online IDE, Electric Imp’s command line tool impt contains a complete testing framework which you can use to run automated unit tests on your application code and libraries. When you have prepared new or updated code, you can check that it passes the tests you have written; if it does, you will have much greater confidence in releasing the code to production.
If new code fails a test, you know you need to spend some time fixing the issue. It might be the result of misbehaving code, or simply that it has been passed a value outside the range it expected to receive. Unit testing specifically and test-driven development in general doesn’t just locate errors early, it also helps you write code that’s more resilient.
The goal of a unit test is to verify that a block of code, such as a function, behaves the way you expect. You write a unit test which targets that function and passes it a variety of inputs. If the function returns correct results and handles bad input without breaking, the tests will pass and you will know your function works correctly — at least for the inputs you provided.
This tutorial will introduce you to impt’s testing system. It won’t cover every aspect of test configuration, but it will get you started and deal with elements of unit testing specifically relevant to the imp application architecture. You can refer to impt’s extensive documentation if you need to know more.
This tutorial has a couple of pre-requisites. First, we recommend that you work through our short introduction to impt before proceeding to the steps below. You will also need at least one imp-enabled device — we suggest the imp006 Breakout Kit, which is available now from the Electric Imp Store.
impt is run from the command line, so this tutorial assumes that you are familiar with accessing the command line on your development machine, and with running commands, creating directories and so forth.
Note Sample code entities in angular brackets, eg. <DEVICE_IDENTIFIER>, are values that you provide.
1. Prepare the Test Project
If you have completed the impt introduction, you may choose to skip this step. We’re going to use impt to create a new project (and impCentral Product) and a Device Group within it. First, create a new directory, impt-test-project, and navigate into it.
Now create the project itself:
impt project create --name impt-test-project --product impt-test-product --create-product
Assuming you don’t already have a Product called impt-test-product and a Device Group called impt-test-project, impt will create these entities within the impCloud for you now. If you know that impt-test-product already exists, omit the --create-product switch.
2. Assign Your Device
Let’s add your imp006 Breakout Board to the Device Group we just created. If you know your board’s unique device ID, or you have already given it a memorable name, you can use either of these values to assign it to the project. Otherwise, enter this command:
impt device list
impt will download a list of devices; look through the list’s id values; imp006 Breakout Board IDs begin with 600a. Copy the full id value, then add it to the following command in place of <DEVICE_IDENTIFIER>:
impt device assign --device <DEVICE_IDENTIFIER>
Alternatively, key in or paste the known device ID or name. Hit Enter. If the device is already assigned to another device group, impt will ask you if you wish to reassign your device — just type Y and hit Enter.
For future reference, you can simplify device identification by giving a device an easy-to-remember name. You’ll need its ID as gathered above and the following command:
impt device update --device <DEVICE_ID> --name <MEMORABLE_DEVICE_NAME>
3. Prepare Test Files
When you create a project using impt, it creates device and agent .nut files for you. These are the files that will contain the application code that impt will eventually upload to the impCloud: the code you will test.
Now set up the test system. Enter and run the following command:
impt test create --dg impt-test-project --device-file device.nut
This adds a test configuration file to the project. This file connects tests to test targets. As you can see in the example above, you specify the code under test. By default impt expects to find a file called device.test.nut, which will contain the tests that will be applied to the code you will write in device.nut. For simplicity, we’re focusing on device code for now, but for a real application you would also reference your agent code when configuring your tests and create an agent.test.nut file to go with it.
Note If you are using Builder to generate your application code from multiple files, make sure that its output is written to the source files you specify to impt.
When you run your tests, impt combines your device code and your device test code into a single source listing which it uploads to the impCloud and deploys to any devices assigned to the project’s Device Group. If you have agent code, it is combined with your agent test code and installed in each test device’s agent. impt also adds code of its own to control the test run.
4. Write a Basic Test
The tests impt runs on your code are implemented as a set of functions which are methods belonging to a test ‘case’. This is a subclass of impt’s ImptTestCase class. In Squirrel, you create a subclass with the extends keyword:
class MyTestCase extends ImpTestCase {
    function testAssertEqual() {
        assertEqual(100 * 1, 10 * 10);
    }
}
Create a new file in your impt project directory and name it device.test.nut. Add the code from the example above to the new file.
Now run the test. To do so use the command:
impt test run
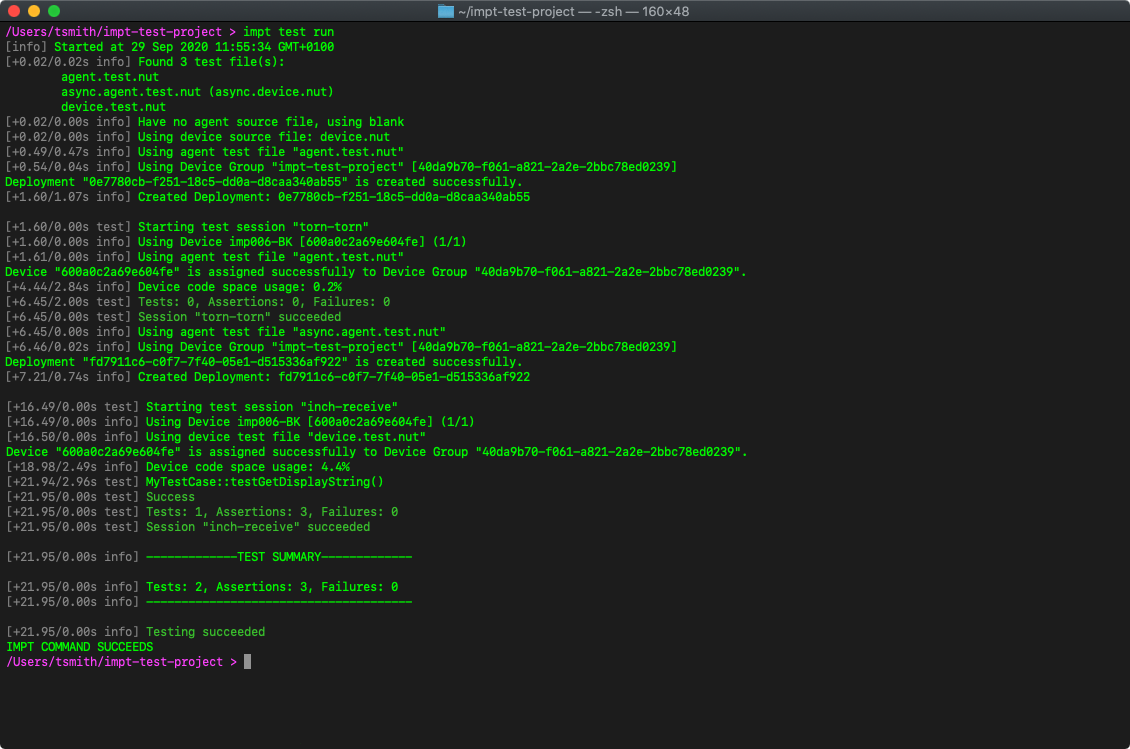
The test is trivial, and will succeed, but it will show you impt’s test output. You’ll see something like:
[info] Started at 21 Jul 2020 13:02:59 GMT+0100
[+0.01/0.01s info] Found 1 test file(s):
    device.test.nut
[+0.01/0.00s info] Have no agent source file, using blank
[+0.01/0.00s info] Using device source file: device.nut
[+0.55/0.54s info] Using device test file "device.test.nut"
[+0.60/0.06s info] Using Device Group "iot-sensors" [90a26ef0-babc-098b-1cc8-b0629b3b5a0d]
Deployment "9b0cc042-840f-e59a-3ff8-a0ec4aba0f33" is created successfully.
[+1.72/1.11s info] Created Deployment: 9b0cc042-840f-e59a-3ff8-a0ec4aba0f33

[+1.72/0.00s test] Starting test session "lion-tonight"
[+1.72/0.00s info] Using Device imp006-BK [600a0c2a69e604fe] (1/1)
[+1.72/0.00s info] Using device test file "device.test.nut"
Device "600a0c2a69e604fe" is assigned successfully to Device Group "90a26ef0-babc-098b-1cc8-b0629b3b5a0d".
[+4.53/2.81s info] Device code space usage: 4.2%
[+7.02/2.50s test] MyTestCase::testAssertEqual()
[+7.02/0.00s test] Success
[+7.02/0.00s test] Tests: 1, Assertions: 1, Failures: 0
[+7.02/0.00s test] Session "lion-tonight" succeeded

[+7.03/0.00s info] -------------TEST SUMMARY-------------

[+7.03/0.00s info] Tests: 1, Assertions: 1, Failures: 0
[+7.03/0.00s info] --------------------------------------

[+7.03/0.00s info] Testing succeeded
When you watch the test run, you’ll see impt creating a code deployment — this is what is transferred to assigned devices and their agents. Once the code has been deployed it is executed and the test results reported back.
The key line in our first test is this one:
assertEqual(100 * 1, 10 * 10);
It asserts that the two function arguments are equal; the assertion fails if they’re not. impt has a number of assertion functions that check that an actual value is greater, less than or within a specified range of the expected result. These functions can be used to check that collection data types – arrays and tables – match up in the values of their properties, and whether functions correctly throw exceptions. You will use many of these functions to determine whether your code is producing the expected results.
Now let’s write something more useful.
5. Write a Unit Test
Edit device.nut and add the following function code. It’s a function from a weather station application that extracts information from a received table of data and returns a string to display on the station’s screen.
function getDisplayString(receivedData) {
    if (receivedData == null) {
        // Error condition -- calling function should check for this
        return "";
    }

    local dataString = receivedData.cast.slice(0, 1).toupper();
    dataString += receivedData.cast.slice(1, receivedData.cast.len()) + ". ";
    dataString += format("Outside temperature: %.1f", receivedData.temp) + "C";
    return dataString;
}
Save the file and then open device.test.nut. We’ll now enter some code to test the function you just wrote by passing in some values to see what happens. If the returned result matches what we expect, the test passes. Replace the code that was already in the file:
class MyTestCase extends ImpTestCase {
    function testGetDisplayString() {
        // Create a test data table
        local testData = {};
        testData.temp <- 42.09;
        testData.cast <- "cloudy"

        // Run the first test
        local result = getDisplayString(testData);
        local expected = "Cloudy. Outside temperature: 42.1C";
        assertEqual(result, expected);
    }
}
Run the test — enter impt test run — and you should see that it succeeds. So far the function under test is working well. What if we don’t get any data to punch in? Add the following to the test function, right after the last assertEqual... line:
result = getDisplayString(null);
expected = "";
assertEqual(result, expected);
Run the test.
Again, it works. The function under test correctly returns an empty string — its error indicator — in response to null data. What if the function itself receives an empty string? Let’s see. Add the following lines at the end of the test function:
result = getDisplayString("");
expected = "";
assertEqual(result, expected);
This time the test fails and the error the index 'cast' does not exist (line 12) is shown. This is because the function under test is not trapping the bad input and is attempting to process the supplied string as a table. Now we know this, we can update the function we’re testing to make sure non-null input is in the form of a table:
function getDisplayString(receivedData) {
    if (receivedData == null || typeof receivedData != "table") {
        // Error condition -- calling function should check for this
        return "";
    }

    local dataString = receivedData.cast.slice(0, 1).toupper();
    dataString += receivedData.cast.slice(1, receivedData.cast.len()) + ". ";
    dataString += format("Outside temperature: %.1f", receivedData.temp) + "C";
    return dataString;
}
Run the test again, and this time it succeeds: the check using the typeof keyword triggers the correct action.
With the test in place, we can continue to add clauses that issue sample input and confirm that the function under test, getDisplayString(), behaves as we expected. When we encounter a failure, we know we need to go back and modify the code accordingly. A case in point: the function makes sure a table is passed in, but it doesn’t check that the table contains the keys cast or temp which it later relies upon. If the table doesn’t have either of these keys, the function will throw an exception when it starts assembling the string that will be returned. As an exercise for later, add tests for these and suitable fixes to getDisplayString().
6. Extend the Tests to Cover Agent Code
So far we’ve written one test for one function within your application’s device code. Typically, you will write tests for all of the data-handling functions in both your device and agent code.
For example, your agent code might call a third-party cloud service to receive weather data, returned in JSON format. You would write tests to check that the agent’s functions correctly extract the desired data from the JSON and/or correctly reads other information, such as error messages returned from the service: if the agent has made too many requests in a given period of time and needs to back off, for instance.
To add agent code testing to the project’s test configuration, enter the following command:
impt test update --agent-file agent.nut
Now create a file called agent.test.nut to hold the tests that will be applied to the code in agent.nut.
Note You can also use the --agent-file switch when you create a test setup (as we did in Step 2) with impt test create.
You can check the current test configuration at any time by calling:
impt test info
You can also use the update command to adjust the test configuration to better meet your needs. For example, using the --test-file switch allows you to specify an alternative pattern for your test file name. By default, as we noted above, impt looks for *.test.nut files, but you might prefer to use test.*.nut. If so just call:
impt test update --test-file 'test.*.nut'
Remember to include the pattern in single quotes to ensure it is not globbed by your shell.
There are a number of other options you can apply. Check out the impt documentation for full details. Many of these options also apply to the create command, so you can specify them when you set up your test environment.
7. Testing Asynchronous IoT Applications
Test functions are run in an arbitrary order, but there are two special functions that you can add to your tests which are run at specific points in the test sequence. They are setUp() and tearDown(), and they top and tail the test functions. You can use setUp() for pre-test preparation — for example, to establish your test data — and tearDown() to clean up afterwards. Both functions are optional and neither requires the other.
We’ll look at one use-case for setUp() in a moment. First, let’s think about some specific issues facing the testing of IoT applications. The tests we’ve written so far address the operation of a simple function right there and then — the test is complete as soon as the code has finished running. However, real-world IoT applications will contain asynchronous operations: your code will trigger actions whose effects are not immediate. Code execution may halt while it waits for data to arrive.
For example, your device code might request data from the agent via the Internet. The device code can’t be sure exactly when — or even if — the requested information will arrive. If impt runs tests immediately, how do we accommodate asynchronous operations when writing tests?
To support asynchronous operation, impt makes use of Electric Imp’s Promise library. All you need to do to convert a synchronous test to an asynchronous one is to return a Promise instance. Don’t return a promise and the test runs synchronously. Simple.
Here’s an example:
class MyAsyncTestCase extends ImpTestCase {

    _var = null;

    function testDeviceOn() {
        local myFunc = null;
        return Promise(function(resolve, reject) {
            myFunc = function() {
                if (_var == null) {
                    imp.wakeup(1.0, myFunc);
                } else if (_var == true) {
                    resolve();
                } else {
                    reject();
                }
            }.bindenv(this);
            imp.wakeup(1.0, myFunc);
        }.bindenv(this));
    }
}
As you can see, the function testDeviceOn() is asynchronous — it returns a promise. The promise encapsulates a function which calls the promise’s own resolve() and reject() methods according to the value of the variable _var. There’s a third alternative: _var is null. In this case neither of those functions are called; instead the function is called again in one second’s time to check if _var has now been set.
Note impt combines your test cases and application code and adds code of its own to the top. Any #require statements in your code will therefore not be applied. So we recommend that during unit testing, you use Builder’s @include directive to load the libraries you need from their source repos.
Create a new file called async.agent.test.nut and paste the code above into it. Let’s now use the special setUp() function to define how _var gets set. Here’s the code, which can be added to the MyAsyncTestCase declaration above the test function:
function setUp() {
    device.on("test.message", function(data) {
        if (typeof data == "table" && "key" in data) {
            _var = data.key;
        } else {
            _var = false;
        }
    }.bindenv(this));
}
Here we have an asynchronous handler: device.on(). This imp API method registers a function that will be called if the named message (test.message) is received by the agent from the device. If the device sends the agent a table containing the key key, then _var is set to the value of that key. In all other cases, _var is set to false and, as the test code further up shows, the test’s promise will be rejected.
A message from the device can come at any time, which is why we need asynchronous operation. But how does the message get to the agent test code? impt takes care of that too.
It works like this. You write the code that your device (or agent, if you’re testing device code) would call and you place it in a file with a name that matches that of your agent test code, but without the .test element. An example shows it best: if the tests we’ve written above are placed in async.agent.test.nut, the companion device code file needs to be called async.device.nut. Create a file with this name and add the following code:
imp.wakeup(5.0, function() {
    agent.send("test.message", {"key": "not true"});
});
This companion file simply provides the triggers for the functions under test. It’s not intended to be full device code from your application. We do it this way because it allows us to control when the message is sent, which may not be possible with real device code that depends on other inputs.
This table shows how the various files fit together:
| Role | File |
|---|---|
| Application Agent code | agent.nut |
| Agent tests | async.agent.tests.nut |
| Agent tests device companion | async.device.nut |
| Application Device code | device.nut |
Now run the test. The test fails, as you would expect: _var gets set to the string "not true", causing the reject() function to be called when _var’s value is checked.
When the test fails, impt continues to the next test in the sequence. You can change this behaviour if you wish: call impt test update --stop-on-fail to cause impt to halt testing at the first failure. However, for asynchronous testing, which might involve a series of separate messages being sent from the companion code, you may prefer to run through all of them before allowing the test to end.
You can also change the timeout allowed for asynchronous operations to trigger: impt test update --timeout <TIMEOUT_IN_SECONDS>. The default is 30s, which may or may not be appropriate for your application. This can be useful to make sure your code doesn’t wait around forever for data that will never come.
Try setting a new, short timeout and increase the time in the imp.wakeup() call in the companion code so that it exceeds the timeout. What happens?
All Done!
Well done, you’ve completed this introductory guide to impt’s unit testing functionality. You’ve used it to:
- Set up an imp application project for testing.
- Write synchronous device-code tests.
- Add agent code tests.
- Implemented the standard setUp() function to prepare test data.
- Write asynchronous code.
- Write companion code to test agent-device interaction.
- Customize the test system.
Next Steps
- Learn about our powerful command line code pre-processor, Builder.
- Visit our GitHub repository to find out more about applying impt in common development use-cases.
- To find out more about the Electric Imp architecture and how it impacts application development, take a look at the Platform Overview.
- Read The Squirrel Programming Guide to learn more about the easy-to-use language all imp applications are written in.
- Work through the Introduction to Squirrel Apps code samples to learn how to use your device’s agent to process readings sent by the device and to communicate with Internet-connected services.