Use Ready-to-Run Code Libraries
Now you understand that there are two parts to each imp application — the agent code and the device code — you’re ready to develop your own connected product. However, you might be wondering how you’re going to come up with all the code you need: the software that runs in the cloud and connects your application to services such as Azure, AWS, PubNub and Twitter, and the code that runs on your device to communicate with the peripherals you want to build into your hardware, such as displays, sensors and actuators.
The good news is that much of this code has already been written for you. Better still, it’s really easy to incorporate this existing software into your own.
Electric Imp maintains an extensive selection of Squirrel libraries, any of which you can include in your code with a single instruction. You’ve already used one of these libraries, WS2812.class.nut, already but there are many, many more.
In this stage of the guide, you will use libraries to get data from the impExplorer™ Developer Kit’s on-board sensors. You’ll also use the Twitter library to publish the readings online:

1. Program Your impExplorer And Its Agent
Here is the code you’ll need to run the example — just paste it over any code you’ve already entered. Again there are two parts: code for the device, and code for the agent. Copy the two code listings below, making sure you paste each one into the relevant part of the impCentral™ code editor:
Device Code
Agent Code
2. Set Up The Twitter Application
Open a new tab or window in your browser. Go to the Twitter website and sign in using your Twitter account. If you don’t have a Twitter account, you’ll need to set one up now.
When you’ve signed in, go to the site’s Apps area. You will need to set up a developer account: just follow the steps and provide the information that Twitter requests.
Once you have set up your developer account, go to the Apps tab (select it from the menu with your username):

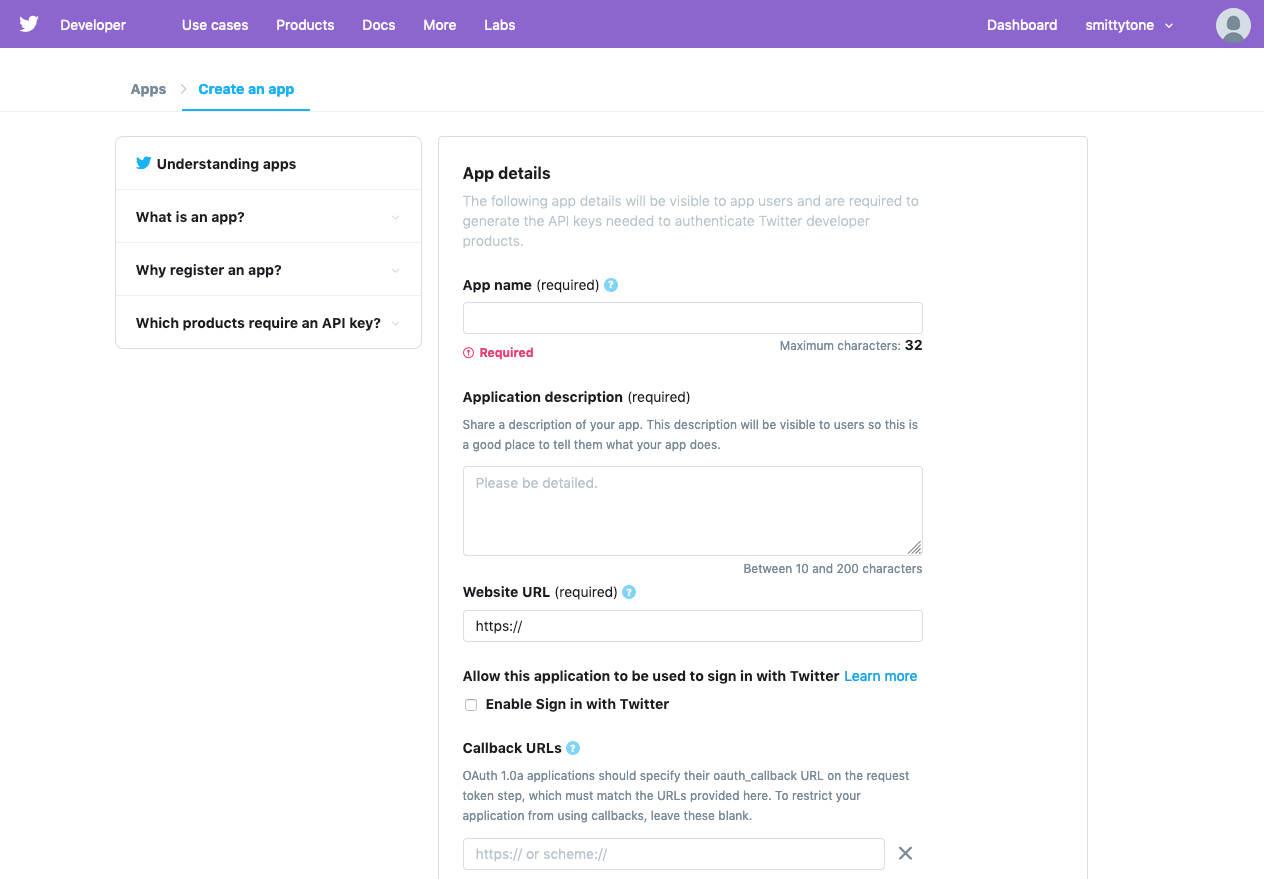
Now click Create an app, and provide the app details Twitter requires: app name, description and website URL. Leave the other fields and checkboxes blank:

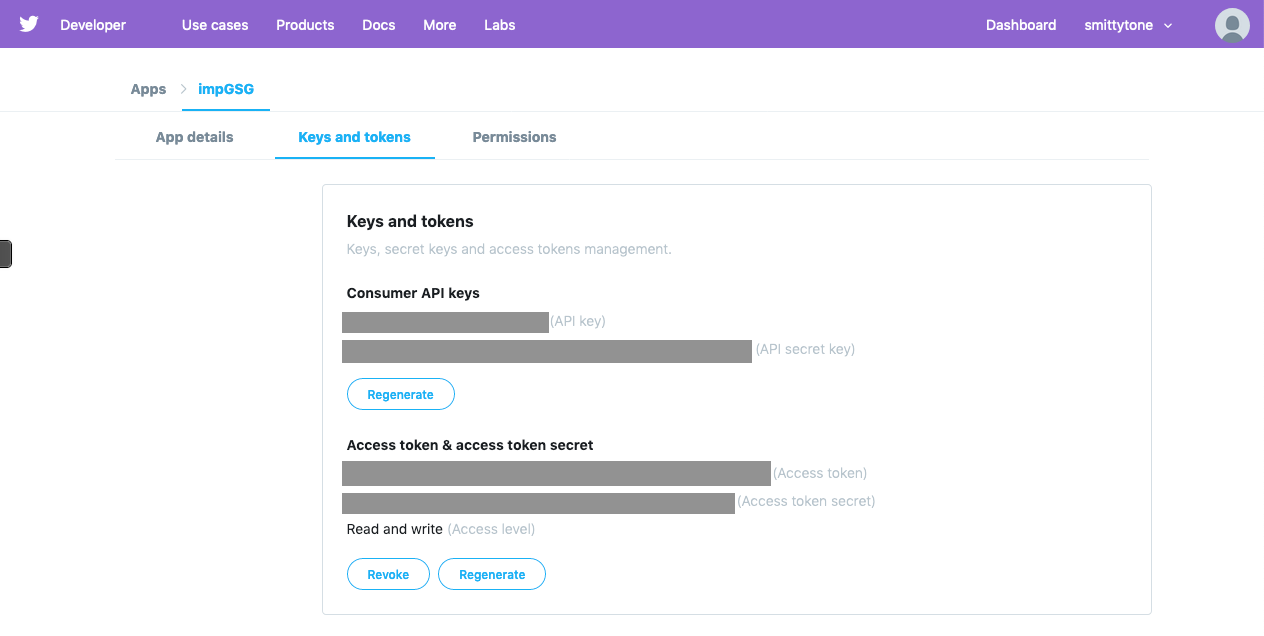
When you’ve set up your app, look for the Keys and tokens tab. Under Access token & access token secret click Create to generate these values. You now have the four codes — Consumer Key (API Key), Consumer Key Secret (API Secret), Access Token and Access Token Secret — that you’ll need to copy into the agent code:

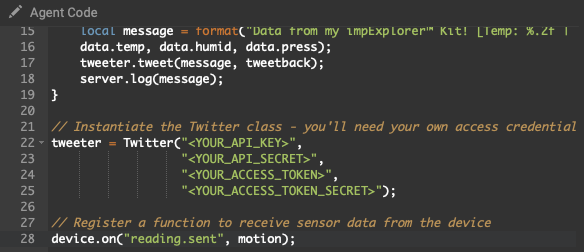
Select these four values one at a time and paste them into the agent code between the double quotes (line 22):

3. Run the Code
Now click Build and Force Restart to install the code ![]() and run it.
and run it.
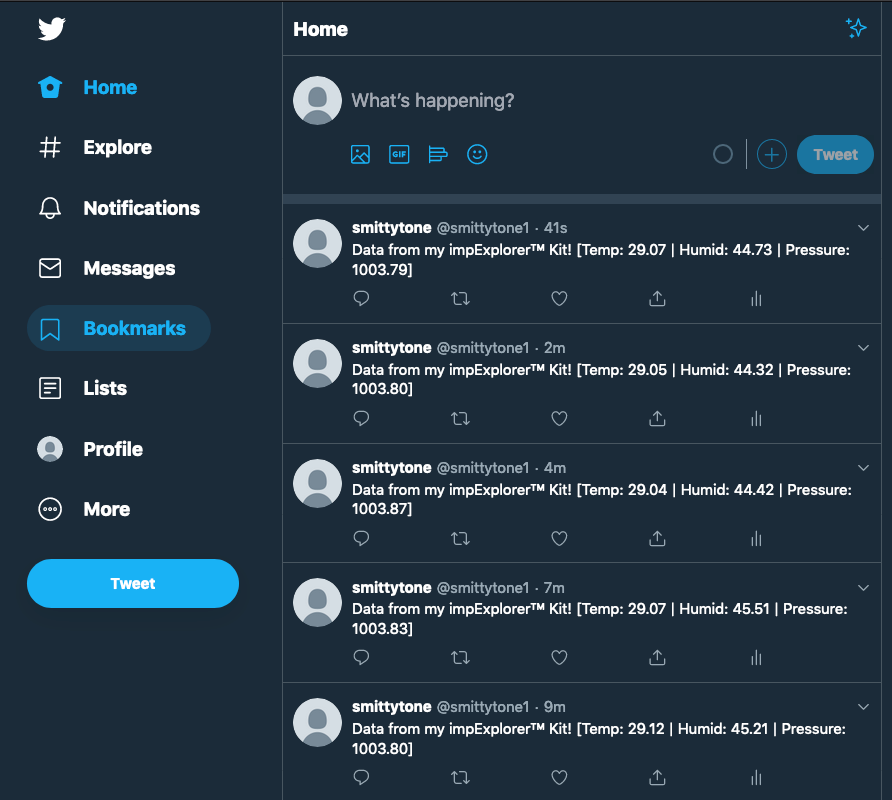
Watch your Twitter stream!
You have now completed the Electric Imp Getting Started guide. Here are some suggestions for your next steps on your Internet of Things journey.
Find Out More
What The Code Does
Let’s look at the device code first. The first three lines are the important ones: they use the directive #require to load in a series of libraries. In each line, you can see the library’s name and version number. The formatting is important: you must include both the full library name and the version number, separated by a colon and wrapped in double-quotes. Don’t place a semi-colon after the directive as this is an instruction for the compiler, not Squirrel code.
Any #require statements you include must appear before the rest of your program code.
Next we declare constants and global variables, among them variables which will reference the impExplorer’s sensors and RGB LED. This is followed by the function that we’ll call to take a set of readings, flash the LED to indicate activity and then put the impExplorer to sleep to preserve power.
The next function performs the aforementioned flash: it sets the LED green, pauses for half a second and then clears it.
In the last section, the impExplorer’s I²C bus is configured and used to instantiate the software objects that represent its temperature and pressure sensors. Notice that we assign the bus to the local variable i2c; all Squirrel variables which are not global must be marked as local to their context using the local keyword. Next, we set up the LED as we did in the Hello World section and, finally, call the function that takes the readings.
This program is quite linear: we set everything up, take a set of readings, flash the LED and put the device to sleep for 120 seconds.
Why do we do all that set up every time? When an imp goes to sleep, it enters a very low-power state to preserve energy. This is very handy if you’re powering it with batteries. It means we only need expend significant amounts of energy when we power the impExplorer up (every two minutes, as set by the constant SLEEP_TIME, which is passed into server.sleepfor() in line 42 to take readings and connect to WiFi to send them (line 23). When the on-board imp001 wakes from sleep, it starts its Squirrel code in a fresh state, so we have to re-configure components and buses.
Why do we not just call server.sleepfor() in line 41? We could but by embedding the call in the imp API’s imp.onidle() we give impOS time to perform any necessary housekeeping before putting everything to sleep. This is the recommended approach. imp.onidle() registers a function that will be called when the imp001 goes idle. Here we don’t pass in a the name of function, we use an inline function declaration.
Now you understand how libraries are included in code, you know what happens in the agent. Once again, we include a library — the Twitter library — at the start of the program. Don’t forget, it has to go right at the top — you can’t include libraries further on in the code or they‘ll be ignored. We also make sure the #require statement provides all the information the code compiler needs: the full library name and the version number.
The agent uses the Twitter library to establish a Twitter instance, tweeter, which we configure with access credentials. We register the function that will be called when the agent receives a message ("reading.sent") from the device indicating the device has been moved. This function extracts the data sent by the device, puts into a message which the Twitter class instance tweets.